How to Add Confetti to Elementor Page
Adding Confetti animation to Elementor is really easy!
No coding skills required. Simply follow these steps and you're good to go.
First Create the Confetti Animation
Step 0: Create a custom Confetti animation and generate the code to install on your website by visiting ConfettiPage.com.

Step 1: Click the black button that says “Copy Code”.

Step 2: On Elementor go to the desired page you want the confetti to be in.
Quick tip: It is recommended to put the confetti animation in the thank you page, to celebrate with your visitor for taking action (signing up, purchase etc).
Then Install the Confetti Code on your Chosen Page
Optional: Modify the Confetti Code to play on Elementor Popup
Please note that the default behavior for the confetti animation is to play is when the page loads.
If you're happy with this behavior, skip this section and continue to Step 2 to Install the Confetti Code you created.
But if you have an Elementor Popup and you want to play the Confetti when the pop up appears, know that it is possible!
You'll need to modify your Confetti Code:
Paste your Confetti Code here:
Note: This modified Confetti Code will make sure that the Confetti animation is not seen until you open the popup.
Now that you have the modified Confetti Code, you can go ahead and install it on your desired page.
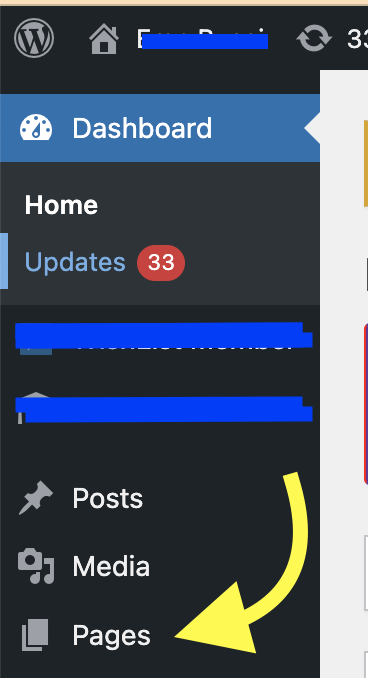
Step 2: Click on "pages" or "blog" on the left menu of your WordPress site, depending on what page you want to add the Confetti to. I am going to assume we are adding it to a page.
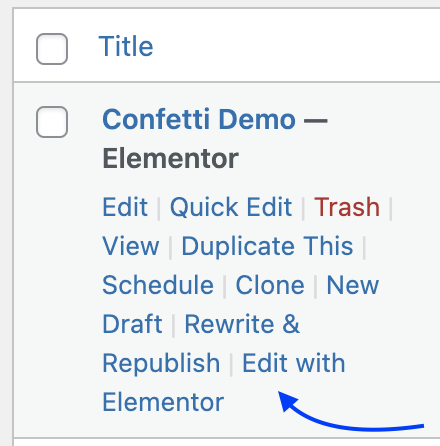
Step 3: Add a new page (if it's a new page) or click on an existing page on your WordPress site and click the "Edit with Elementor"
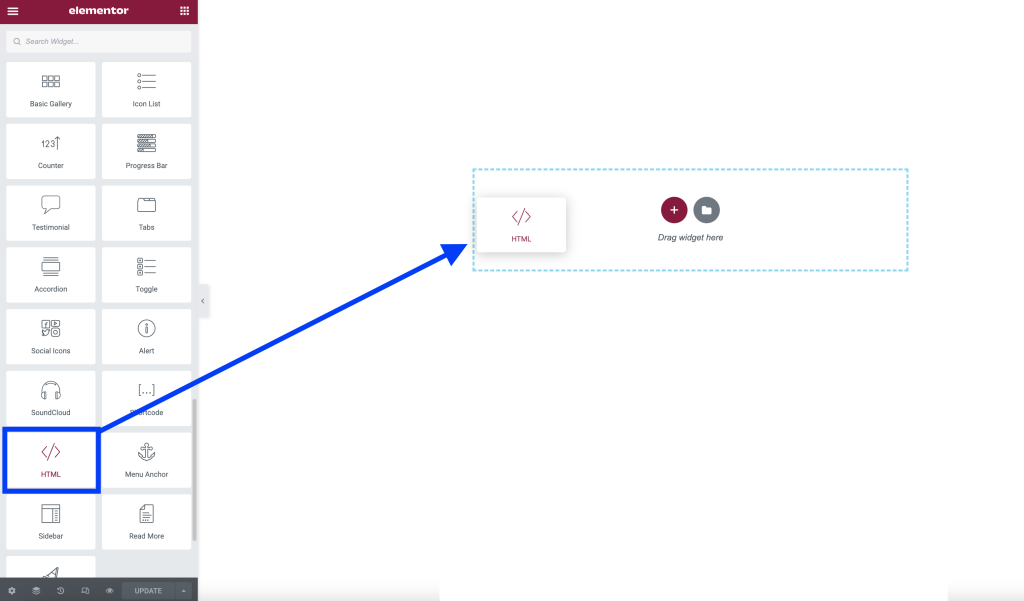
Step 4: Once you are in the Elementor page builder, hover to the left menu and scroll through all the elements (or search) and find the "HTML" element. Then draft that element to the page builder. It doesn't matter where you add it.
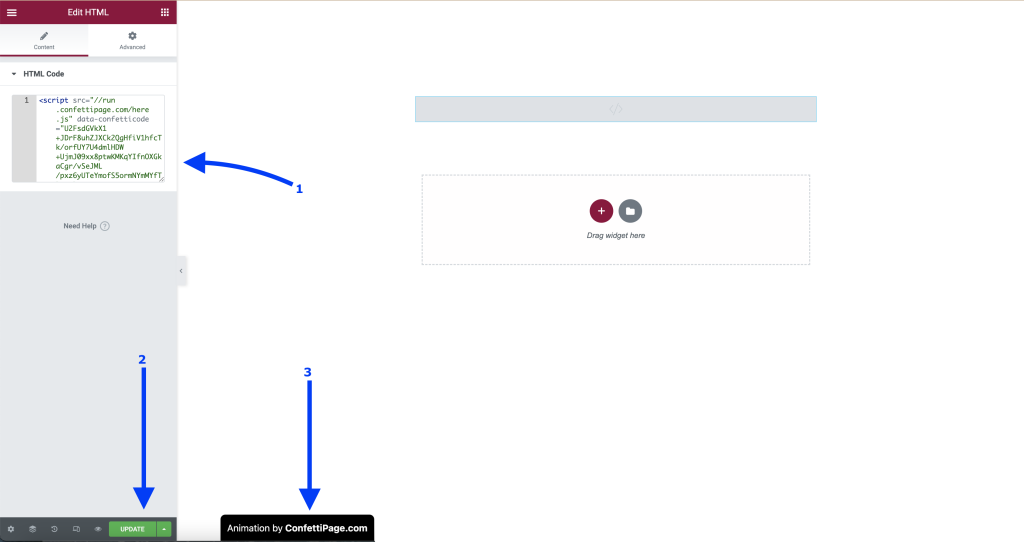
Step 5: As soon as you drag it in, you will see on the left menu a place to paste the HTML code.
If you don't see it for some reason, simply click on the element that you dragged in and the left menu will then show.
Once you see it (as pictured below), paste the Confetti code into the HTML code area.
As soon as you do, the Confetti will appear on the page and if you are using the free version you will see the "Animation by ConfettiPage.com" watermark.
You click the "UPDATE" button in green.
Then preview the page and see your Confetti working - congratulations! 🎉
Your Confetti animation is installed successfully.

Important note: If you are not seeing the Confetti appear, you either failed to do one of the earlier steps, or you installed the code on a domain name that is different to the one the code was created for. A Confetti Code will only work on the specific domain you assigned it to.
Step 6 (optional): If you are using the free version, you will see the “ConfettiPage.com” branding appear at the bottom left.

If you would like it removed, simply pay for a license to use it without the watermark.
Note: Once you pay for a license, you will need to create a new Confetti code as a paying customers which will generate a watermark-free code for you to install.